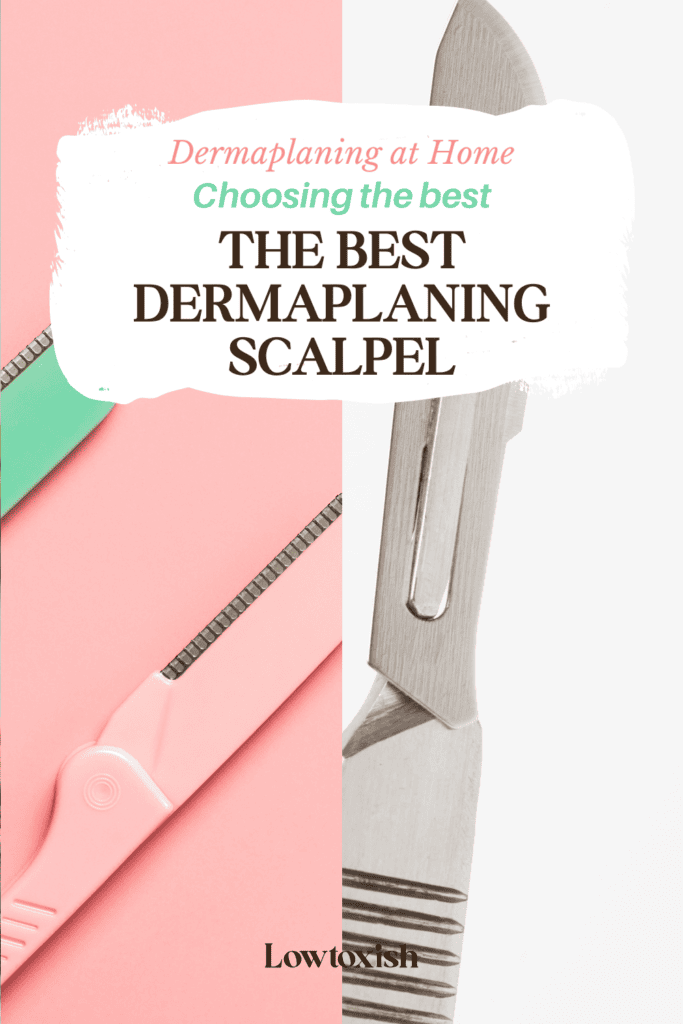
Dermaplaning at Home: Choosing the Best Dermaplaning Scalpel
This post is about choosing the best dermaplaning scalpel.
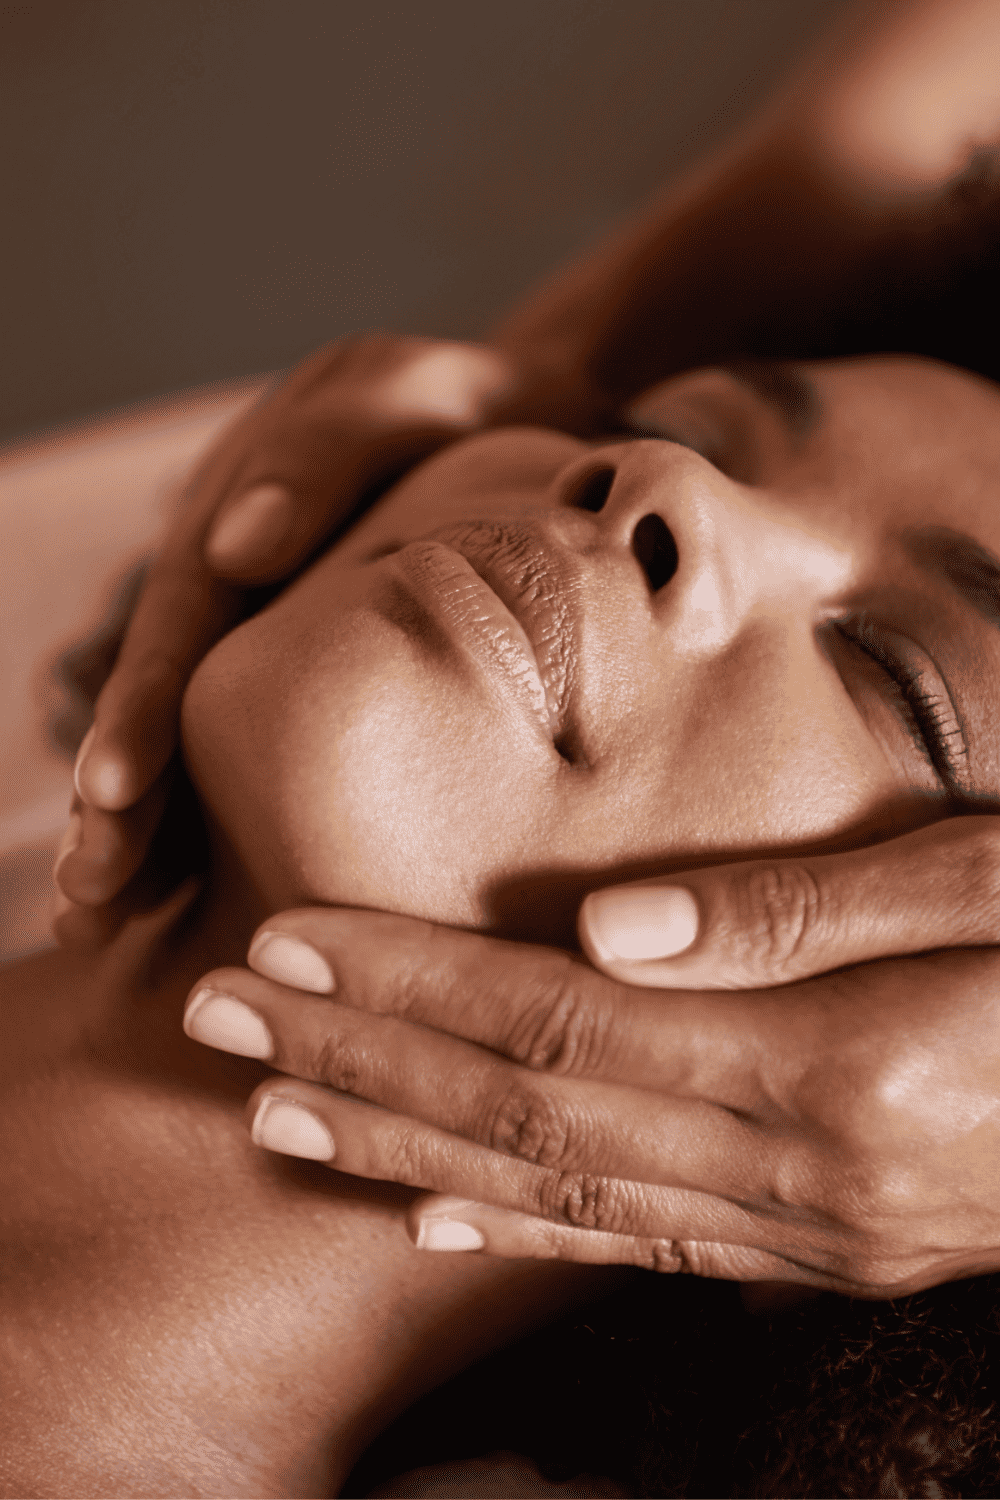
Let’s talk about something that’s been a game-changer in the world of skincare – using a dermaplaning scalpel to dermaplane. Not to mention, it’s a non toxic option for very effective skin care. The older I get and the more I research non toxic beauty the more I get excited about techniques, procedures, and beauty gadgets that don’t require risky injections or topical creams that are expensive and often have sketchy ingredients.
It’s all about getting that smooth, glowing skin by whisking away dead cells and those tiny facial hairs. And guess what? You don’t always have to head to a salon to get it done.
Dermaplaning at home is totally doable and can be kind to your wallet too. But, and it’s a big but, the trick lies in picking the right scalpel. Don’t worry, though; I’ve got you covered. This guide is all about helping you find that perfect tool for safe and effective at-home dermaplaning. Ready to dive in? Let’s get your glow on!
At-Home vs. Professional Dermaplaning Dermaplaning Scalpel Use
The Pros and Cons: Dermaplaning Scalpel Use
At-Home Dermaplaning
- Pros:
- Cost-Effective: Significantly reduces the expense over time.
- Convenience: Offers the comfort of performing the procedure in your own space and time.
- Personal Control: Allows you to tailor the process to your specific skin needs.
- Cons:
- Potential for Incorrect Technique: Without professional guidance, there’s a risk of improper use leading to skin damage. I also know someone who used a very sharp professional grade scalpel to DIY dermaplane and dropped the blade and cut her hand deeply. Yikes.
- Equipment Quality: Home kits may not match the efficacy of professional-grade tools.
Professional Dermaplaning
- Pros:
- Skilled Expertise: Professionals have in-depth knowledge and experience.
- Enhanced Safety: Reduced risk of cuts and infections.
- Holistic Treatment: Often combined with other skin treatments for a more comprehensive approach.
- Cons:
- Higher Cost: Regular professional sessions can be expensive.
- Appointment Constraints: Involves scheduling and possibly waiting for appointments.

Grab your Free
Printable 2024 Art Calendar

Embrace inspiration every day with our FREE 12 month 2023 printable art calendar, featuring stunning masterpieces from renowned artists.
Simply fill out the form bellow and the printable files will be sent immediately to your inbox.
Types of Dermaplaning Scalpel Options For At Home Dermablading
Understanding Your Options for a Dermaplaning Scalpel
When you decide to try dermaplaning at home, the first step is to pick the right tool for the job. There are several types of dermaplaning scalpels out there, each with its own unique features and benefits. Let’s break them down:
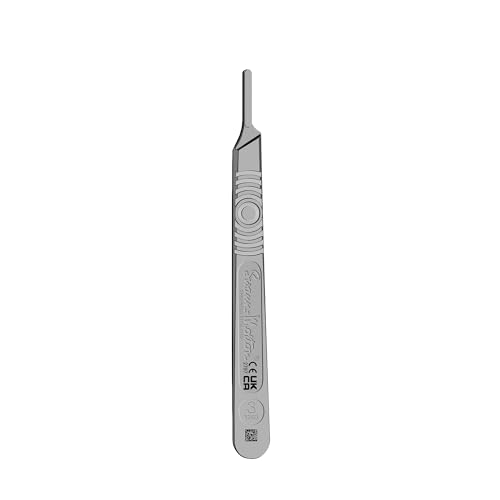
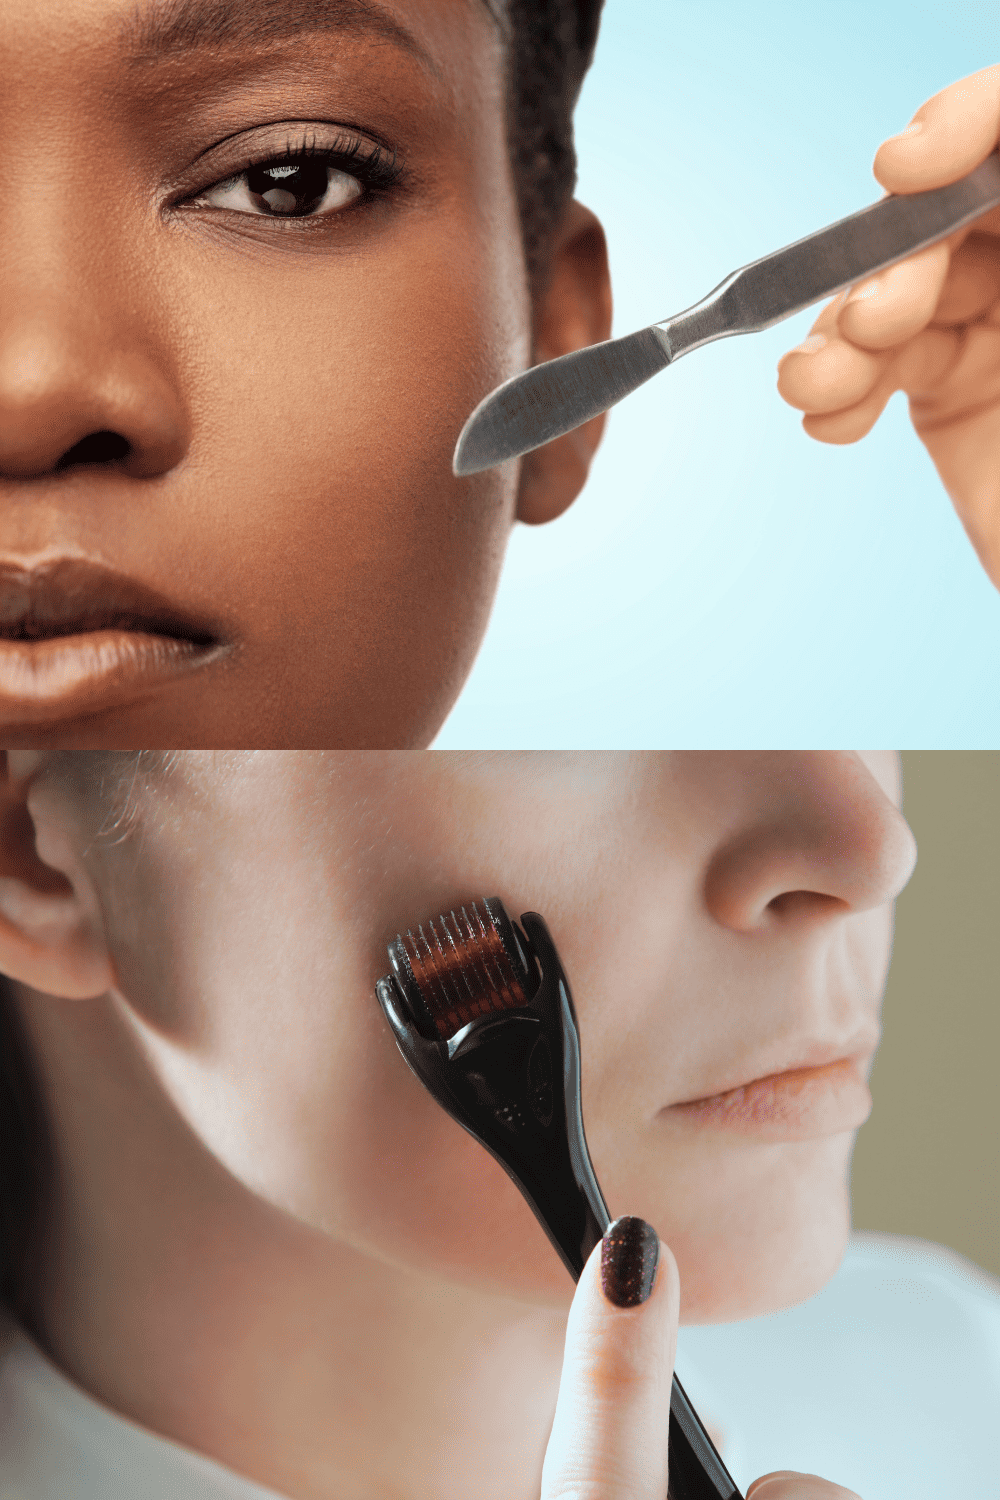
Professional Level Dermaplaning Scalpel
- Overview: Standard blades are the go-to choice for most at-home dermaplaning enthusiasts. They are typically what you’ll find in most starter kits.
- Best For: Those who have some experience with dermaplaning or have steady hands. They work well for an all-over facial treatment.
- Features: These blades offer a balanced blend of safety and efficiency. They are sharp enough to effectively remove dead skin cells and peach fuzz, but not so sharp that they pose a high risk of cuts.
- Considerations: While they are versatile, these blades require a bit of practice to use safely and effectively. It’s crucial to learn the right angle and pressure to avoid skin irritation. This is the category that I would consider a true dermaplaning scalpel.
Examples of Professional Dermaplaning Scalpel Blades (that I recommend):

Precision Blades
- Overview: As the name suggests, precision blades are designed for targeted, detailed work. They are smaller and more delicate than standard blades.
- Best For: Those looking to focus on specific areas, such as around the eyebrows, the nose, or other sensitive or hard-to-reach areas.
- Features: Precision blades offer greater control, allowing for careful maneuvering around tight spots without affecting surrounding areas.
- Considerations: These blades aren’t ideal for full-face dermaplaning. They are more about refining and detailing after you’ve done the broader work with a standard blade. Also, their small size demands a higher level of control and precision.
Examples of Precision Dermaplaning Blades (that I recommend):
Guarded Blades
- Overview: Safety is the hallmark of guarded blades. They come with built-in safety features to minimize the risk of nicks and cuts.
- Best For: Beginners, or those who might have shaky hands or concerns about safety. They’re a great choice if you’re just getting started with dermaplaning.
- Features: These blades often have some form of protective guard along the edge, which acts as a barrier between the blade and your skin. This design helps to prevent the blade from going too deep or slipping and causing injury.
- Considerations: While they are the safest option, guarded blades might not provide as close a dermaplaning experience as the other types. This means they might be less effective at removing finer hairs or getting that ultra-smooth finish. However, they’re a fantastic way to build confidence and technique before moving on to more advanced blades.
Examples of Guarded Dermaplaning Blades (that I recommend):
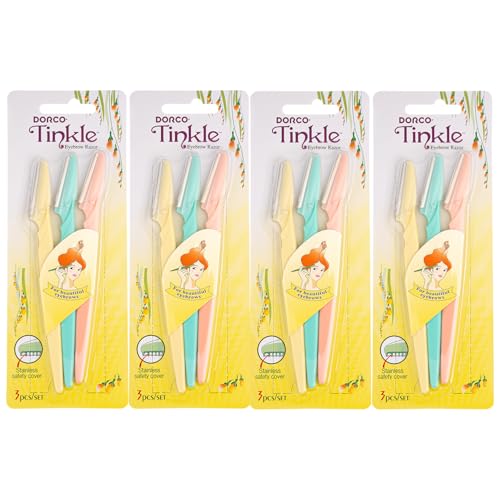
Beginners Dermaplaning Blades (e.g., Tinkle Razors)
- Overview: Perfect for those new to dermaplaning or prefer a gentler approach.
- Features:
- Safety-Oriented Design: These blades usually have a protective guard to minimize the risk of nicks and cuts.
- User-Friendly: Easier to handle than traditional dermaplaning tools, making them a great starting point for novices.
- Versatility: Can be used for dermaplaning as well as for other facial hair removal tasks, like shaping eyebrows.
- Considerations:
- Less Intensive Exfoliation: While effective for hair removal and light exfoliation, they do not provide as deep an exfoliation as standard or precision blades.
- Material and Durability: Often made with a combination of stainless steel and plastic, they are less durable than professional-grade blades but are a cost-effective option for beginners. I started with this level and the blades are VERY dull so while they get the hair off and they are not likely at all to lead to a deep cut, they also can leave little scratches if you push too hard because the metal is cheap. Still a great option for beginners- just let it be what it is and don’t push too hard.
Examples of Beginners Dermaplaning Blades (that I recommend):
Pros and Cons of Different Scalpels
Making an Informed Choice
Every scalpel type has its strengths and considerations:
- Professional Scalpels:
- Pros: Offers a thorough dermaplaning experience.
- Cons: Requires a steady hand and familiarity with the technique. BE CAREFUL
- Precision Blades:
- Pros: Best for accuracy in small areas.
- Cons: Not efficient for full-face dermaplaning.
- Guarded Blades:
- Pros: Reduced risk of nicks and cuts.
- Cons: May offer less close contact with the skin.
- Beginner Blades:
- Pros: Very affordable and safe.
- Cons: Not as effective and if you press too hard to try to exfoliate or get a better “shave” you might get little scratches. Think of it as the butterknife of dermaplane scalpels.
Safety Concerns
Navigating the Risks
Dermaplaning, while beneficial for skin health and aesthetics, comes with its own set of safety concerns. It’s essential to be aware of these risks to ensure a safe and effective dermaplaning experience. Let’s delve into the key safety factors:
Blade Sharpness
- Overly Sharp Blades: While a sharp blade is necessary for effective dermaplaning, an excessively sharp blade increases the risk of unintended cuts or deeper abrasions. This is particularly a concern for those new to dermaplaning or using a new type of blade.
- Dull Blades: On the other hand, using a dull blade can lead to skin irritation and uneven results. A dull blade requires more pressure, which can lead to skin trauma or even scarring.
- Balancing Act: The ideal blade should be sharp enough to remove hair and dead skin cells efficiently but not so sharp that it easily cuts the skin. Regular replacement of blades is crucial to maintain this balance.
Technique
- Angle and Pressure: Dermaplaning should be done at a 45-degree angle to the skin. Too steep an angle can lead to cuts, while too shallow won’t be effective. The pressure should be light to medium, never too forceful.
- Direction of Strokes: Short, light strokes in the direction of hair growth are recommended. Avoid going over the same area multiple times, as this can increase irritation.
- Learning Curve: For those new to dermaplaning, it’s advisable to start slowly and perhaps practice on a less visible area of the skin. Watching instructional videos or even consulting a professional for a tutorial can be helpful.
- Dry Skin Vs. Wet Shave: I’ve seen some people recommend using a serum or something with slip to allow the blade to move more easily but I recommend a dry dermablade surface for two reasons:
1. It is helpful to see the hair on your face and any dead skin and a wet surface will make that difficult.
2. A wet surface is going to be a lot more slippery and that could lead to your blade slipping in your hands, dropping, or lead you to make strokes that are longer than you intend.
When dermaplaning is done in office they have you at more of a horizontal level but when you do it yourself you have gravity to contend with since you’ll be standing up.
Hygiene
- Sterilization of Blades: Before using a dermaplaning blade, ensure it is sterile. Use alcohol wipes to clean the blade thoroughly to prevent any risk of infection.
- Clean Working Environment: Make sure the area where you perform dermaplaning is clean. This includes washing your hands and ensuring the skin is clean and dry before starting.
- Post-Dermaplaning Care: Apply a gentle, soothing serum or moisturizer immediately after dermaplaning. Avoid using harsh chemicals, exfoliants, or retinoids right after, as the skin will be more sensitive.
Additional Considerations
- Skin Sensitivity: Not everyone’s skin is suited for dermaplaning. Those with skin conditions such as acne, rosacea, or eczema should consult a dermatologist before attempting it.
- Avoid Certain Areas: Be cautious around areas with acne, inflammation, or skin lesions. Dermaplaning over such areas can exacerbate the condition and lead to further skin issues.
- Dispose of Blades Properly: Once a blade has been used the recommended number of times, dispose of it safely. Do not reuse blades meant for single use, as this can lead to infection and decreased effectiveness.
By paying attention to these safety concerns, you can enjoy the benefits of dermaplaning while minimizing the risks. Remember, if you’re ever in doubt, it’s best to consult with a skincare professional.
Aftercare and Maintenance
Post-Dermaplaning Care
I wrote a comprehensive guide to dermaplaning aftercare here. It will teach you the 10 steps towards effective dermaplaning aftercare as well as non toxic dermaplaning aftercare products I recommend. Here is a super short version though. Proper aftercare is crucial for maintaining healthy skin post-dermaplaning:
- Moisturize: Hydrate the skin to restore its natural barrier.
- Non Toxic Serums: Post dermaplaning your skin is ready to drink in all of your fancy and effective serums. Make sure they are non toxic.
- Non Toxic Makeup: It’s best to not wear foundation for a day or so post dermaplaning but if you do, make sure it’s non toxic.
- NO Exfoliants: Dermaplaning is a form of exfoliation. Do not use retinol or any acids that are exfoliants or anything that will irritate your skin post dermablading.
- Sun Protection: Use a broad-spectrum sunscreen to protect the newly exposed skin layers. Avoid direct sun for a day or two if you can.
- Scalpel Care: Clean and store your scalpel properly to maintain its efficacy and hygiene.
Conclusion
So, there you have it! Ready to give at-home dermaplaning a whirl? It’s a fantastic way to get that smooth, glowy skin we’re all after. The key is really in picking the scalpel that’s just right for you and getting the hang of those safe, gentle strokes. And remember, skincare’s a personal journey – what works like a charm for one person might not be the ticket for someone else.
In my personal opinion, dermaplaning (at home) has very low key after care… it’s not painful and you aren’t left bruised or peeling or raw after. However, the better the results you want the better and sharper the dermablading scalpel you need and that is where a low key at home treatment can become very high risk. My suggestion is to start with the Tinkle razors and go easy- just try to remove the hair from the face.
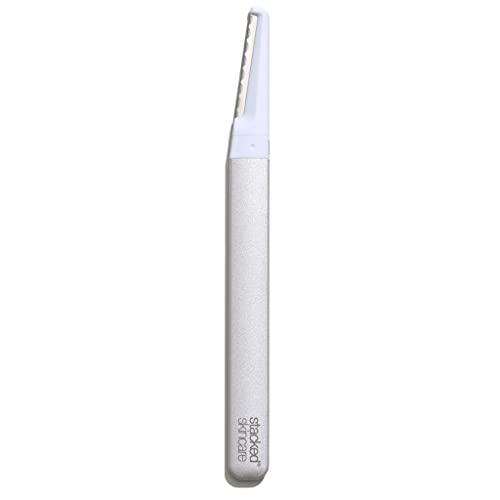
If you felt good about using the Tinkle razor and want to level up, I would try the Stacked Dermaplaning Blade which is like the big sis to the Tinkle- sharper blade, better results, but the same feel as the Tinkle razor.
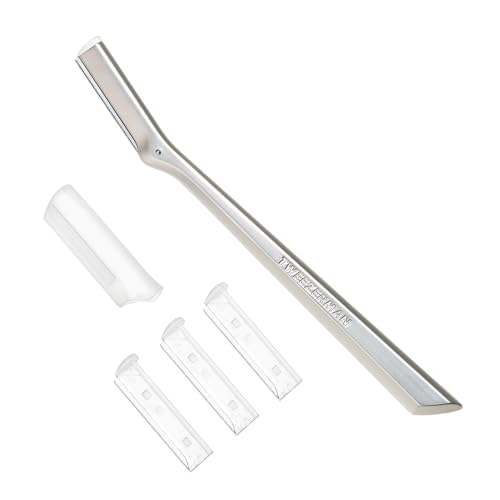
Lastly, if you conquer the Stacked blade, or similar model and haven’t come close to cutting yourself then you could go all the way and use a professional use dermaplaning scalpel.
On the other hand, if you want to dermaplane but have zero desire to ever use a legit scalpel and want the best but also safest results out of the gate it might be a good idea for you to choose a guarded dermaplaning blade like this.
So, have fun experimenting and discovering what your skin loves the most. Embrace this adventure into dermaplaning and get ready to be wowed by the fresh, radiant look you’ll uncover. Here’s to stepping up your skincare game and loving the skin you’re in! 💫
More posts like this…
10 Essential Steps for Effective Dermaplaning Aftercare
Top 6 Best Dermaplane Blades for At-Home Dermaplaning
Dermaplaning and Microneedling: Get the Glowing Look Celebrities Love
Favorite Clean Beauty Posts

Favorite Posts


Last update on 2026-06-24 / Affiliate links / Images from Amazon Product Advertising API
This product presentation was made with AAWP plugin.