Amazing Red Light Therapy at Home Before and After Photos
This post is about red light therapy at home before and after.
This post about red light therapy at home before and after may contain affiliate links, which means I’ll receive a commission if you purchase through my link, at no extra cost to you.
Red light therapy, is an amazing non-invasive therapy that has been getting a lot of attention for its potential to do wonders for your skin, help with pain, and boost your overall well-being. It’s more than potential, numerous clinical studies have been done on red light therapy and show not only visual subjective changes but also measurable changes in areas of inflammation, collagen, and skin elasticity.
More and more people are trying it out at home, and the results they’re seeing? Pretty amazing. Let’s take a closer look at some before and after pics from people who have used red light therapy at home. In this article I’m going to focus only on the skin rejuvenating benefits of red light therapy because those are the benefits that you will be able to see in before and after pictures.
Understanding Red Light Therapy
What is Red Light Therapy?
Red light therapy involves exposure to low levels of red or near-infrared light (these are different wavelengths of light). Each wavelength offers different benefits. Red light wavelengths around 630-670 offer great benefits in improving complexion and skin brightening as well as collagen production. The optimal wavelength for infrared light is around 850. Infrared light penetrates more deeply than red light and stimulates cellular activity and promotes healing.
Before: Common Skin Concerns and Conditions
- Wrinkles and Fine Lines: Many individuals sought red light therapy to address signs of aging, including wrinkles and fine lines
- Acne and Scarring: Those dealing with acne and scarring love red light therapy for the way it clears and brightens their skin.
During: Consistent Home Treatments
It’s important to note that red light therapy isn’t a quick fix. Results you will see in these before and after pics come after individuals using their at home red light therapy devices in a specific way, including:
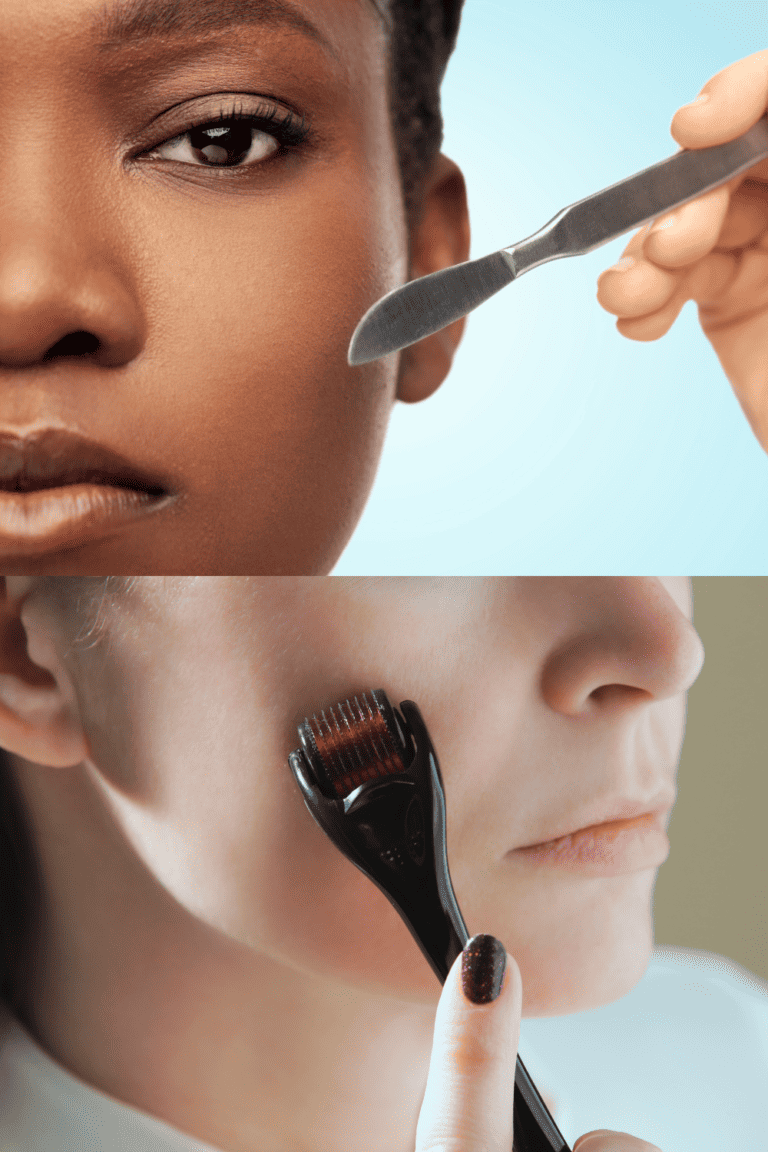
- Customized Routines: It’s important to pick devices that target specific concerns, individuals utilized red light therapy wands, panels, or masks. CONSISTENCY IS KEY
- Comfortable Sessions: Red light therapy does necessitate the need to relax and sit back for a bit while it does its thing. The exception is wands, which require more active participation in the treatment.
- Adherence to Guidelines: Following manufacturer guidelines on distance, duration, and frequency, users maintained a disciplined approach. Don’t think you are hacking the system by moving a device closer to the skin than the manufacturer recommends, you could damage your skin this way. Same thing with treatment length- don’t overdo it.
After: Transformative Outcomes in Skin Health and Look
- Visible Reduction in Wrinkles: Users reported smoother and more youthful-looking skin with a visible reduction in wrinkles.
- Improved Skin Tone: Red light therapy contributed to improved skin tone and texture.
- Acne Clearance: Many experienced clearer skin with a reduction in acne and scarring.
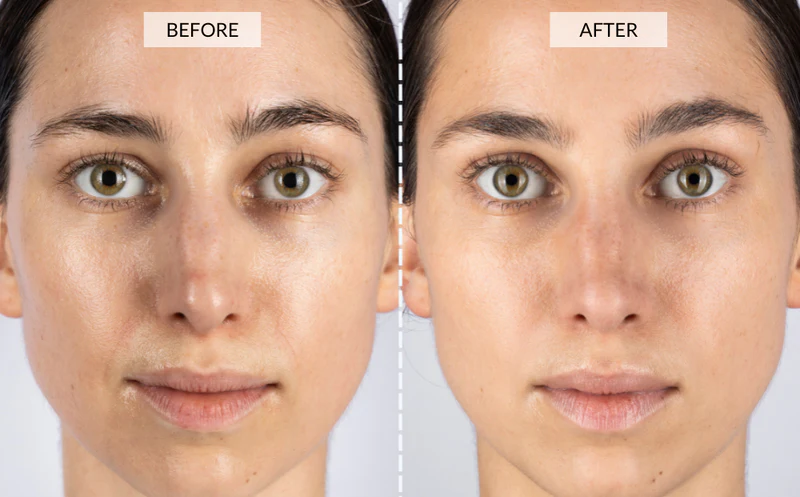
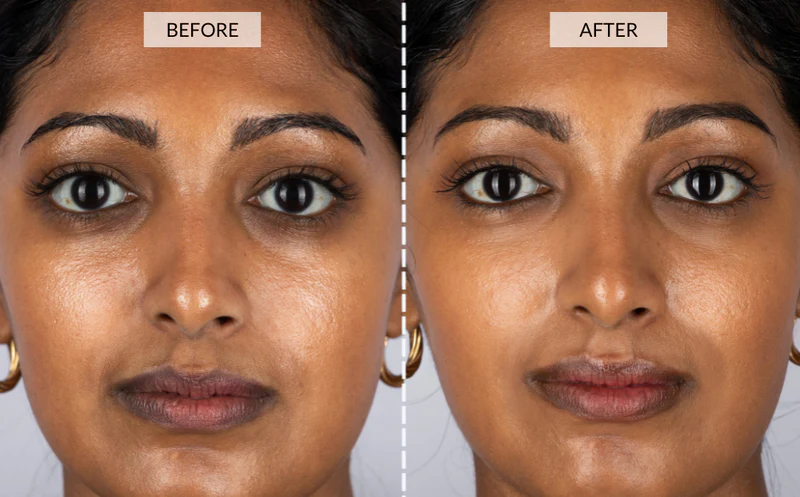
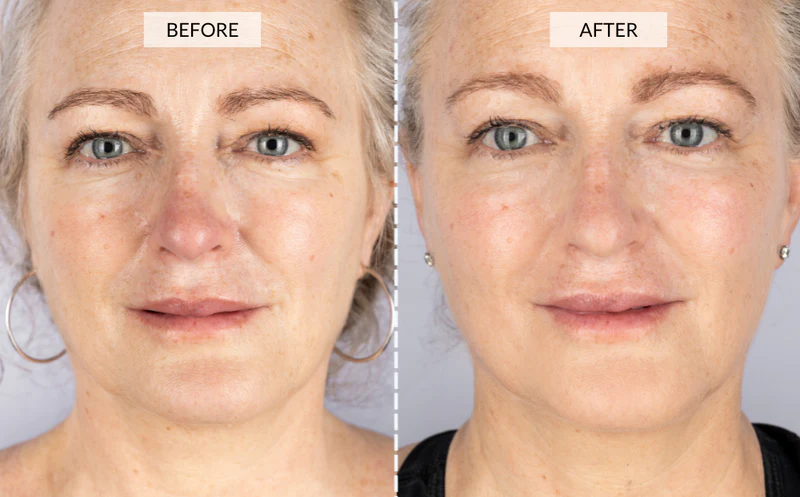
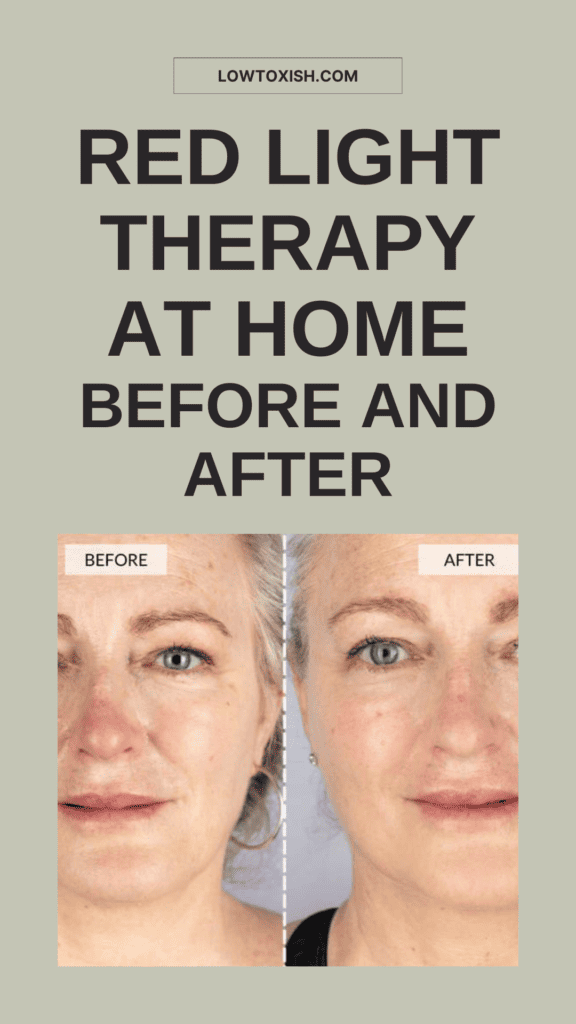
Red Light Therapy at Home Before and After Pictures
I use the CurrentBody Skin LED Light Therapy Face Mask and LOVE it. The specs for this device are optimal and I love the flexibility of the mask because it allows me to also use it on my neck and chest. I have only been using the mask for about a month and a half or two, which is a bit too short to see impressive before and after pics but I personally can tell a big difference in the brightness and evenness of my skin tone.
Once I’ve been using the mask for 10-12 weeks I’ll update this post with my own personal before and after but for now, I asked Currentbody (which has so many TOP TOP TOP notch red light therapy devices) if I could use some of their before and after pics.
Note that the Lighting Is Exactly The Same and There Is No Photoshop
I have been a photographer and image editor for 20 years (this is what I do when I’m not writing this blog) and I know Photoshop when I see it and these images are not Photoshopped. Beyond that, it takes a lot of discipline to exactly reproduce lighting and exposure and angle of a shot to offer accurate before and after images. These images all were taken with the same lighting scheme- look at where the hi-lights are on each of the images- they are all the same.